
Double exposures, when they’re done well, are incredibly impressive. The literature on how to do them is fairly limited, but here, I’ll explain how they work and how they’re done.
How to Make a Double Exposure
If you’re doing this on digital, there are two ways that I’m familiar with. The first requires your camera to be capable of doing in-camera double exposures. If possible, there is typically a setting or an in-camera application to assist with this. The second way is really simple and done in Photoshop. If you’re going the Photoshop route, take two images of equal size (or at least make them equal size) and open up them up as two layers in the same document. Set the blending mode to “Screen,” and you’ve got yourself a double exposure.

Shooting film is a different story. If you happen to have a camera that has a built-in function for doing a double exposure, you’re fortunate. Most film cameras do not have this function, but some do. Of my personal camera collection, my Nikon F100 and Mamiya 645 Pro TL have this capability. My Nikon F2 and Mamiya RB67 do not have a built-in function for this, but are still just as capable of it. For the latter example, it is easy enough. The Mamiya RB67 has two different levers, one for cocking the shutter and another for advancing the film. For it and any other camera like it, after taking a picture, you simply cock the shutter and don’t advance the film.
If you have a film camera with a mechanical advance that cocks the shutter and winds the film simultaneously (i.e., you have to advance the film yourself with a lever), you may or may not be able to take a double exposure. For many film cameras (my Nikon F2 included), there is a button on the bottom of the camera that you have to press in order to rewind the film. For those cameras, you should take your photo, and while pressing the winder release (button on the bottom of the camera), you “advance” the film and cock the shutter.

If your camera automatically advances your film and does not have a built-in function for double exposures, I doubt double exposures are possible without entirely shooting through the same roll twice. Such is the case with certain Pentax 67s and my Fuji GA645. While on the topic of shooting through the same roll twice, it is a fairly common method and can be fun if you’re the kind of person that is pretty carefree about their photographs. If that is what you decide to do, I would suggest attempting to find a way to have the exact same starting place on the film both times you intend to shoot through the roll. Otherwise, the likelihood of not having any of your exposures lining up is pretty high.
What Is a Double Exposure?
To preface this section, the initial explanation of how a double exposure works is not technically correct. Why on earth would I provide an explanation that isn’t totally correct? Great question! The answer is because the technical answer is a great deal more complicated. So, while I hate to start off with a hand-waving explanation, it’s what I’m going to do. Following the (arguably over-) simplistic explanation, I’ll provide a brief dive into a more complex but more accurate explanation and will perhaps at some point do a much deeper dive into how this works.
The easiest way to mentally process a double exposure is to think of it in terms of black and white photography. If you consider an image to be a very dense grid with values from black (completely unexposed) to white (completely exposed), a double exposure is the process of placing two images on top of one another and then, in combination, taking the lighter value (more exposed) from each cell. To illustrate this concept, I’ve come up a two simple example that are not attractive (at all) but it gets the point across.

Image 1

Image 2

The “Double Exposure”
Images 1 and 2 are simple screenshots of Excel file grids with a heat map applied to them. The resulting “double exposure” is the combination of the two heat maps. For each cell of the two exposures, the larger value (i.e., the more “exposed”) is kept. While it may be difficult to see, this concept is illustrated with the numbers in the cells. As can be understood from this, the order in which the photos are taken doesn’t matter. This can also be seen in Photoshop by simply switching the order of the photos. Indeed, a double exposure is just one specific case of the more general concept of multiple exposures, and the same holds true regardless of the number of exposures.
If you’ve read up to this point, you’ve probably wondered one of two things. If you’re wondering how this explanation is overly simplistic and not technically correct, you’re in the same place I was in when I first started doing multiple exposures and had no one to help me think through the specifics. If instead, you’re wondering how the above could possibly be correct — that, in fact, why am I not actually doubling the values rather than keeping the higher value? The answer is that while technically you actually sum the light intensity (input), you do not always double the response to light (output). The response to light intensity differs between digital and film.
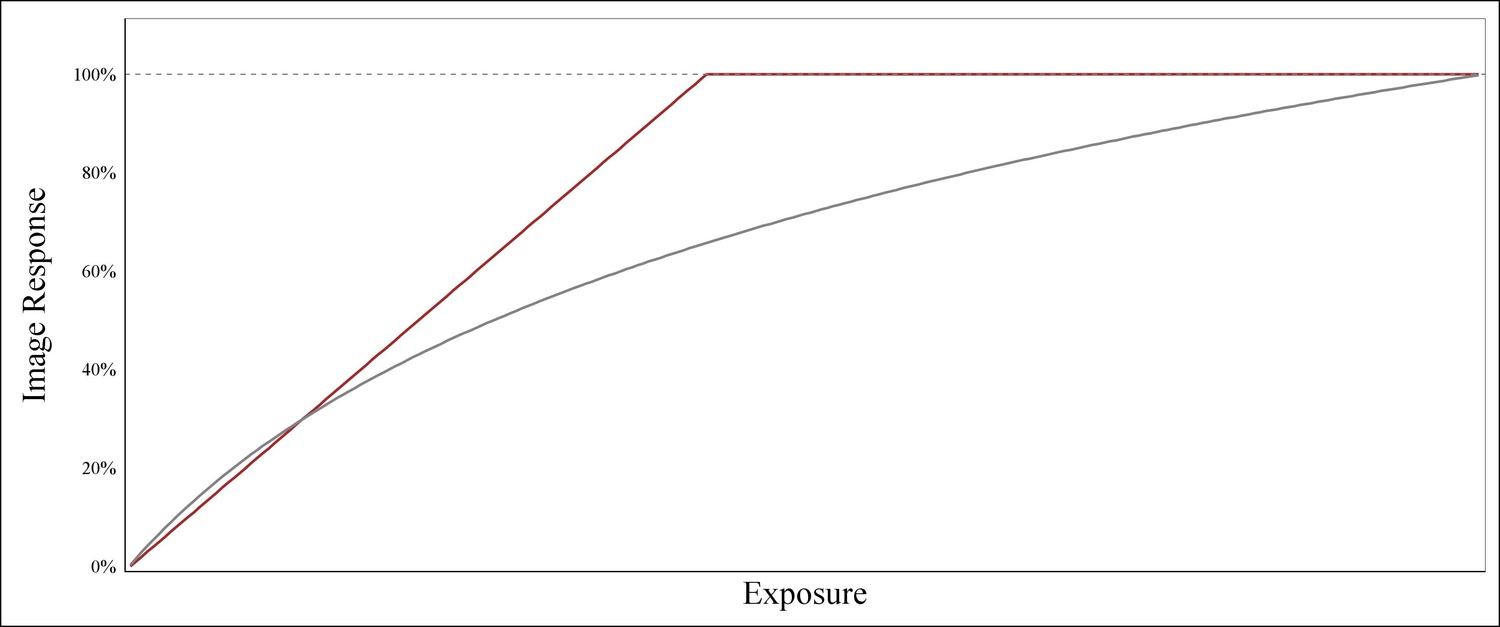
Response curve of Digital and Film
The response curve to light for a digital camera is linear (i.e., double light input = double response). As such, for the above example using Excel, you would simply add the numbers in each cell to determine the final image lightness in the sensor’s response. Film, however, does not respond to light this way. The difference lies in the response curve. Film’s response to light is logarithmic: this is why film can handle such a large degree of overexposure and why reciprocity failure exists. As such, doubling exposure (input) will not translate to doubling the image’s response. Further, while a digital camera responds to multiple exposures is additive, film is more likely to adopt the light intensity from the brighter of two images.
For those that are interested, I will try and put together a more thorough explanation of how both digital and film respond to multiple exposures. For this initial article, however, I hope you find the above examples satisfactory. If you’re a film photographer and have stayed on this long, hopefully, the next section will shed a bit more light on this topic.
Biggest Misconception in Film Double Exposures
The largest misconception I come across as it pertains to making double exposures on film is that you simply shoot two exposures that are both underexposed by one stop. Admittedly, in theory, this makes sense. Shooting 1 stop underexposed equates to half of the light hitting the negative for two exposures. In other words, you’re taking two exposures, each with half of the light needed for a neutral exposure. This results in one solid neutral exposure. As much as this particular technique has validity at face value, I’ve tried it over and over and have rarely liked the outcome. In theory, it works well, but I don’t think it works particularly well in practice. If you already shoot film, you’re probably well versed in how much overexposure it can take (sans slide film). As such, why aim for a neutral exposure when you can easily shoot 1-2 stops overexposed without much, if any, adverse results?

Low Hanging Fruit
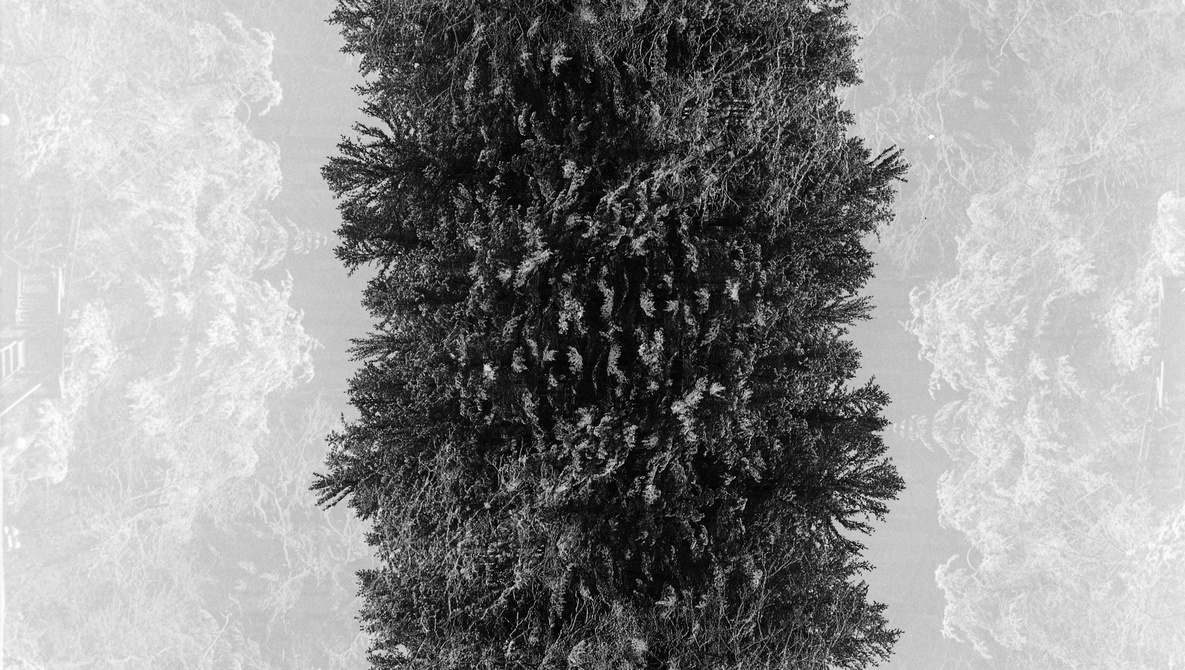
In general, I’ve found that one neutral exposure of a mid-to-low contrast scene mixed with a high contrast scene make for the easiest successes. For example, the most common types of double exposures I see involve the silhouette of someone or something with a second image there as texture. Secondly, the mixture of a portrait with a high contrast scene (think strong light source or a landscape at dawn or dusk) make for great shots when they’re done well. What makes them “done well” you ask? It’s all about proper framing. High contrast landscapes can make for nice images too. This brings me to the double exposures that I generally find most interesting and most difficult: shooting two portraits together. I would suggest having one shot be a silhouette and the other a neutral exposure. Either way, it’s fun to play around with them regardless of the subject.

Are you a fan of multiple exposures? If so, please share some of your work below.