
Panorama photos are huge, sharp, and fascinating. In this article, I will show an easy way to automatically stitch a panorama in CameraRaw and finish them off in Photoshop.
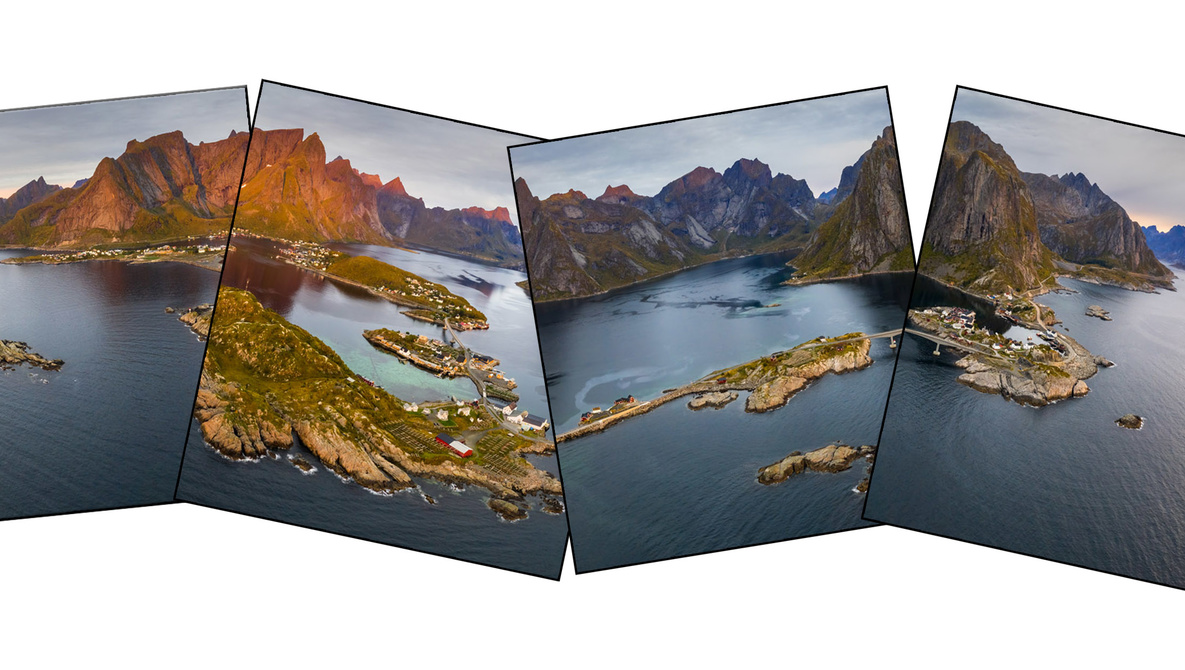
From time to time, I make a panorama. There can be several reasons for this: To increase the number of megapixels of the final photo and thereby making it sharper, or if I do not have a lens which is wide enough and I want to capture the entire scene. In this example, it is both. In the last part of the above video, you can see me flying my drone around the gorgeous Reine area in Lofoten, Norway. To capture the entire collection of islands you have to make a panorama and a drone does not have a great amount of megapixels to work with, so all the better to make a panorama. When I take photos for my panorama, I start in one end with locked-down settings, take a photo, pan the drone to the side, and take the next photo. I usually aim to have between 30% and 50% overlay of the photos. DJI drones do come with built-in panorama modes, but for the most part, they do not fulfill my needs. You will have to play around with that yourself.
When I have my photos, I download them to the computer and open them in CameraRaw, which is the raw file converter to Photoshop.

When I have opened the photos in CameraRaw I select them all by selecting one and use the shortcut Ctrl+A to select all. I right-click on one of them and choose “Merge to Panorama”. If you are photographing in a high contrast scene, you can also bracket your photos and make an automated “HDR Panorama”.

When CameraRaw has stitched the panorama, the window “Panorama Merge Preview” pops up. Here there are three different merge types: Spherical, cylindrical, and perspective. All options stitch the panorama differently and I seem to have the most success with the cylindrical option.

Underneath the projection option I play around with the other settings and in this particular, I decided to deselect everything. I went with uncropped as I felt the mountains got a bit close to the edge of the frame relative to the length of the panorama. I also skipped doing any kind of boundary warp as the edges and horizon became distorted. The “Fill Edges” tab works acceptably in this example, but some of the waves did not fill properly so I skipped that too and I wanted to do my own adjustments, so I did not choose “Apply Auto Settings”. When you are done with the panorama, you select “merge” and save it to your hard drive.
Now you simply just apply whatever adjustments you want to the photo. In my case, I decided to change the aspect a bit, as I felt the panorama was a bit too wide.

When you are done with your adjustments in CameraRaw you open it as a smart object in Photoshop by holding down Shift and left-click on “Open Object”.

Within Photoshop I crop the Panorama a bit on either side by using the “W x H x Resolution” crop option as shown in the below photo.

Hereafter, I press Ctrl+T, while the layer is selected, to transform the layer and right-click and choose “Warp”.

I use the warp selection to stretch out and cover the gaps. I would suggest playing around with the corners first.

Now there are many ways you can fill those gaps. You can also make a new layer and use the clone stamp tool to fill them, with a slightly different outcome, or something third. I, however, found this to be the easiest in this example.

When you are done, it is just about making the final adjustments and you are done.

Did you find this article helpful? Do you have another way to make panoramas? Let me hear down below.